Configuring Tag Placement Rules
Density, offsets, and view-specific rules.
Last updated: 2024-12-01
Once you've decided which elements to tag (via filters), placement rules determine where each tag lands. This page covers orientation, position presets, clustering behavior, and overlap avoidance -the settings that control exactly how your tags appear in the view.
Tag Orientation
Tag orientation controls whether the tag text reads horizontally, vertically, or adapts automatically based on the element direction.
- Automatic - Smart placement that chooses the best orientation for each tag.
- Horizontal - All tags read left-to-right regardless of element orientation. Standard for most floor plans.
- Vertical - Tags read bottom-to-top. Useful for tight vertical shafts or riser diagrams.
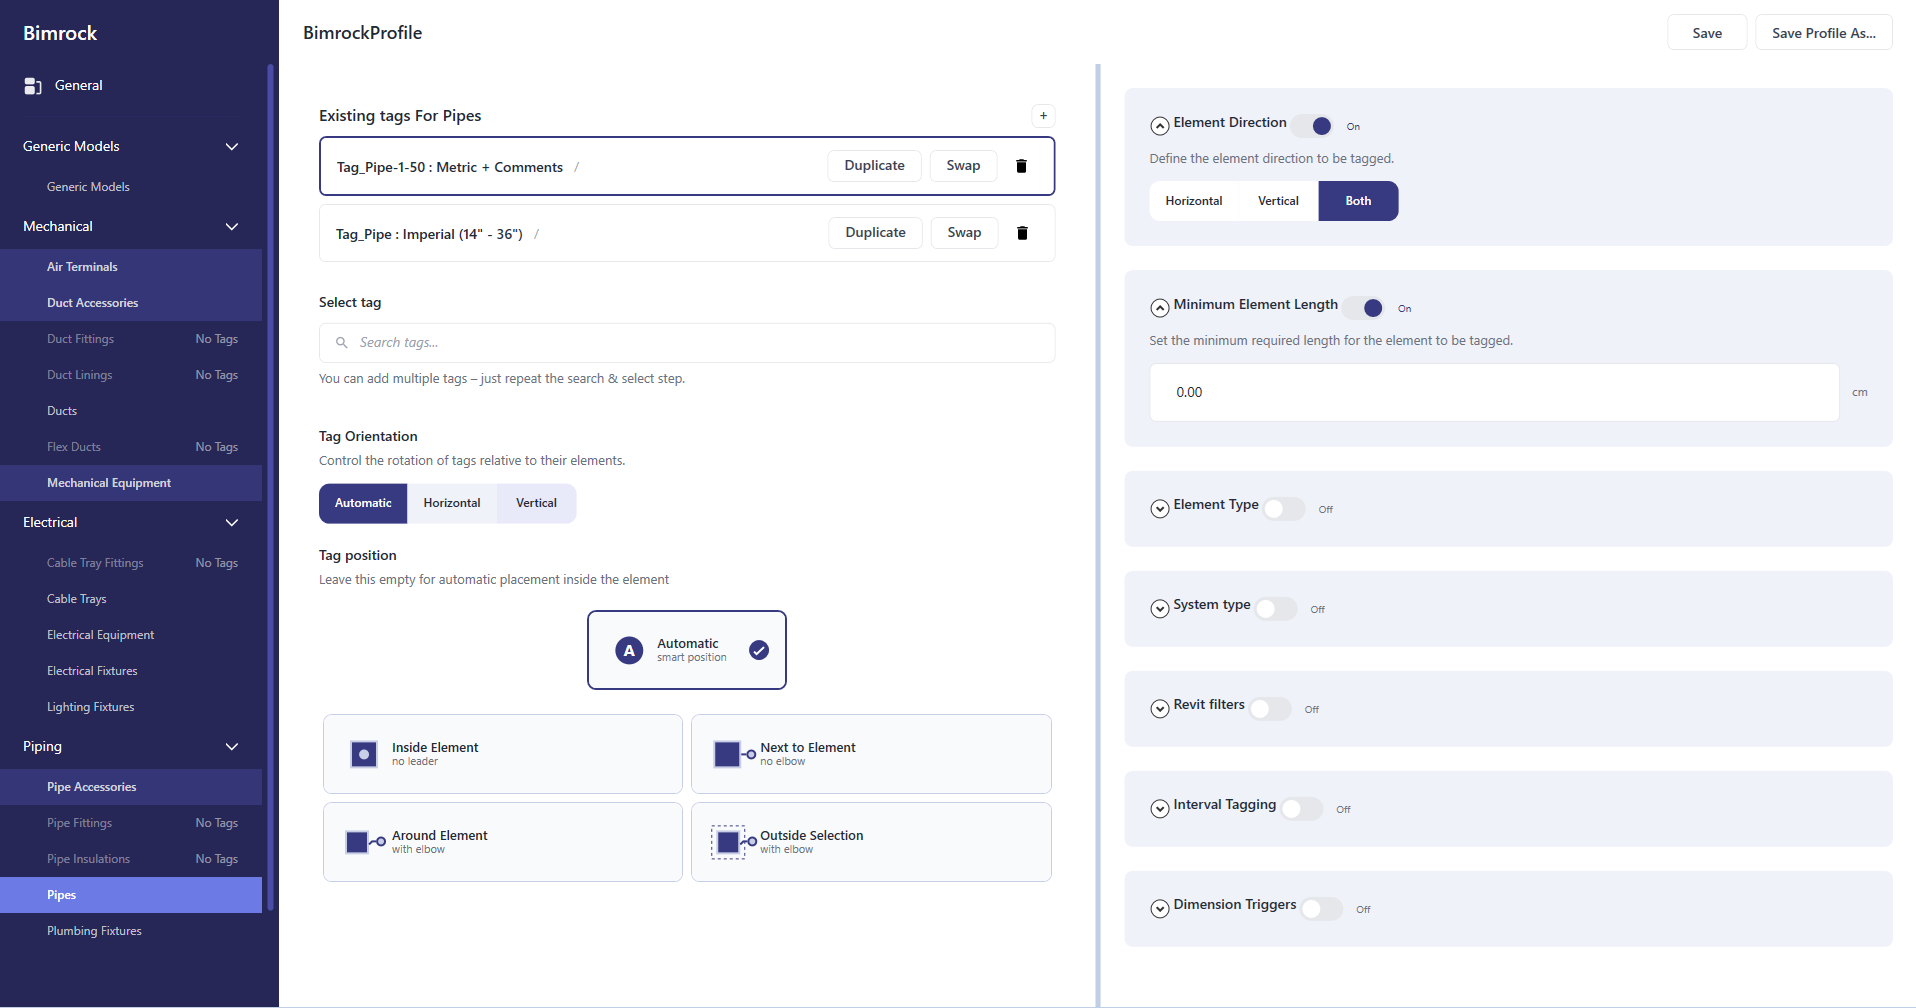
Tag Position Presets
Position presets define the general strategy for where tags land relative to their elements. Each preset has different behavior suited to different view types.
Inside Element
Tags are placed directly on top of the element, centered or at a specific position within the element bounds. Best for wide ducts or pipes where the tag fits comfortably.
- Use the position grid to anchor tags at specific locations (center, start, end)
- Enable "Allow Longer" or "Allow Wider" to let tags extend beyond element bounds if needed
- Works best for simple, uncluttered areas
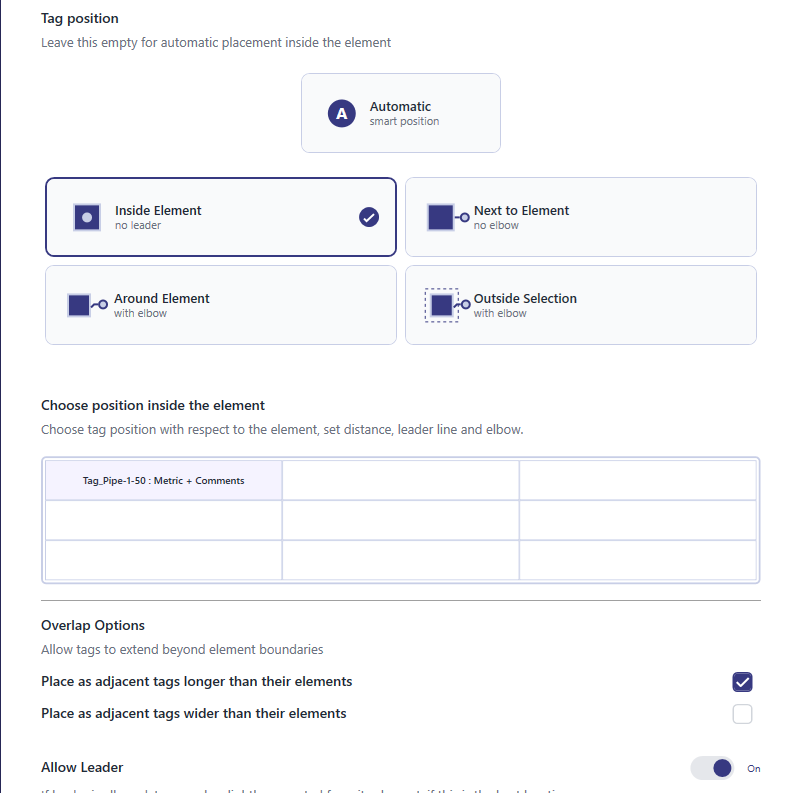
Next to Element
Tags are placed adjacent to the element with a short leader line. Useful when placing tags inside would obscure the element or create overlap.
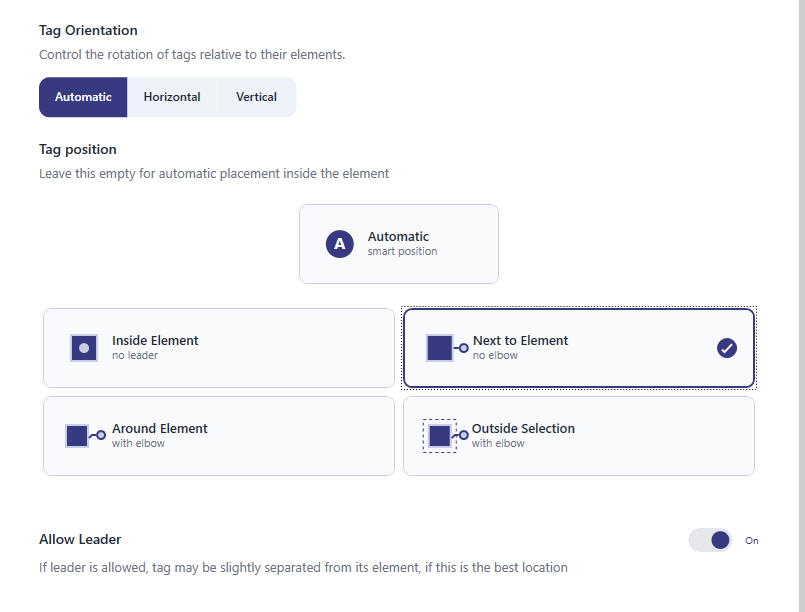
Around Element
Tags are distributed around the element perimeter, typically with leaders. This mode supports clustering -grouping multiple tags together to reduce clutter.
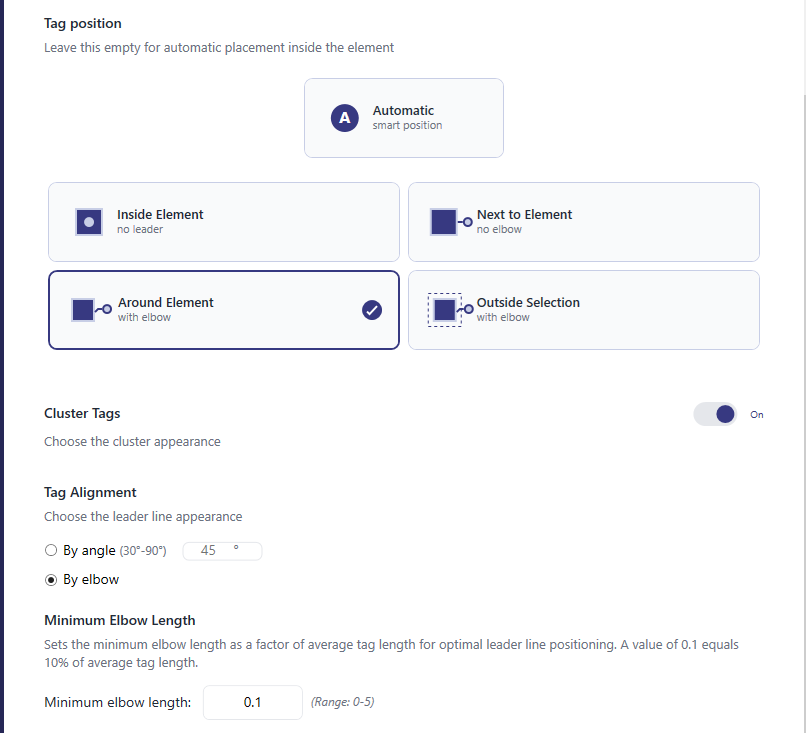
- Cluster Tags - Groups tags that would otherwise overlap into a single cluster
- Tag Alignment - Align cluster by angle or by elbow for cleaner appearance
- Best for equipment rooms and dense mechanical spaces
Outside Selection
Tags are placed outside the current view or selection boundary, pulling leaders to a designated area. Ideal for congested views where tags need to be moved completely out of the way.
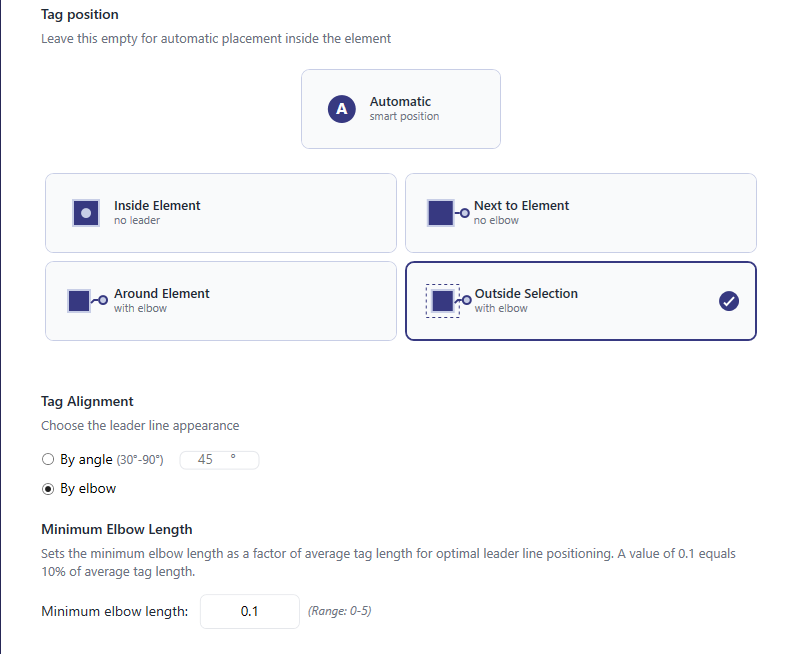
- Minimum Elbow Length - Ensures leaders have consistent elbow lengths for alignment
- Works well with Align Elbows tool for post-processing cleanup
- Use for very congested views like equipment rooms
Non-Overlapping Categories
Non-Overlapping Categories define which element categories tags should avoid when being placed. This is a placement constraint, not a filter -elements in these categories are still tagged, but other tags will avoid overlapping them.
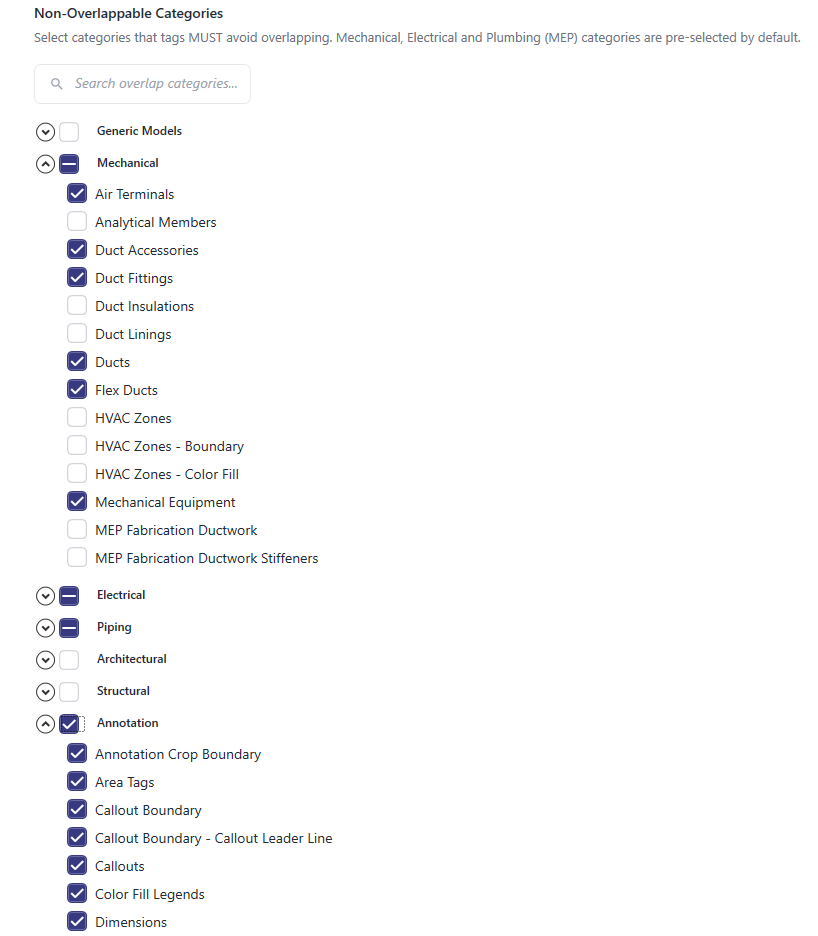
- Check categories that represent important elements you want to keep visible
- Tags will be repositioned or given leaders to avoid covering these elements
Post-Placement Cleanup
Even with optimal placement settings, some views may need manual cleanup. The Arrange ribbon provides tools for this:
- Tag Selector - Quickly select only tags in a region for adjustment
- Align Elbows - Create clean vertical "rail" lines from leader elbows
- Sort Cluster - Automatically space and align a group of tags
- Alignment buttons - Fine-tune horizontal and vertical alignment