Working with Profiles
Create, customize, and share tagging profiles for consistent documentation.
Last updated: 2024-12-01
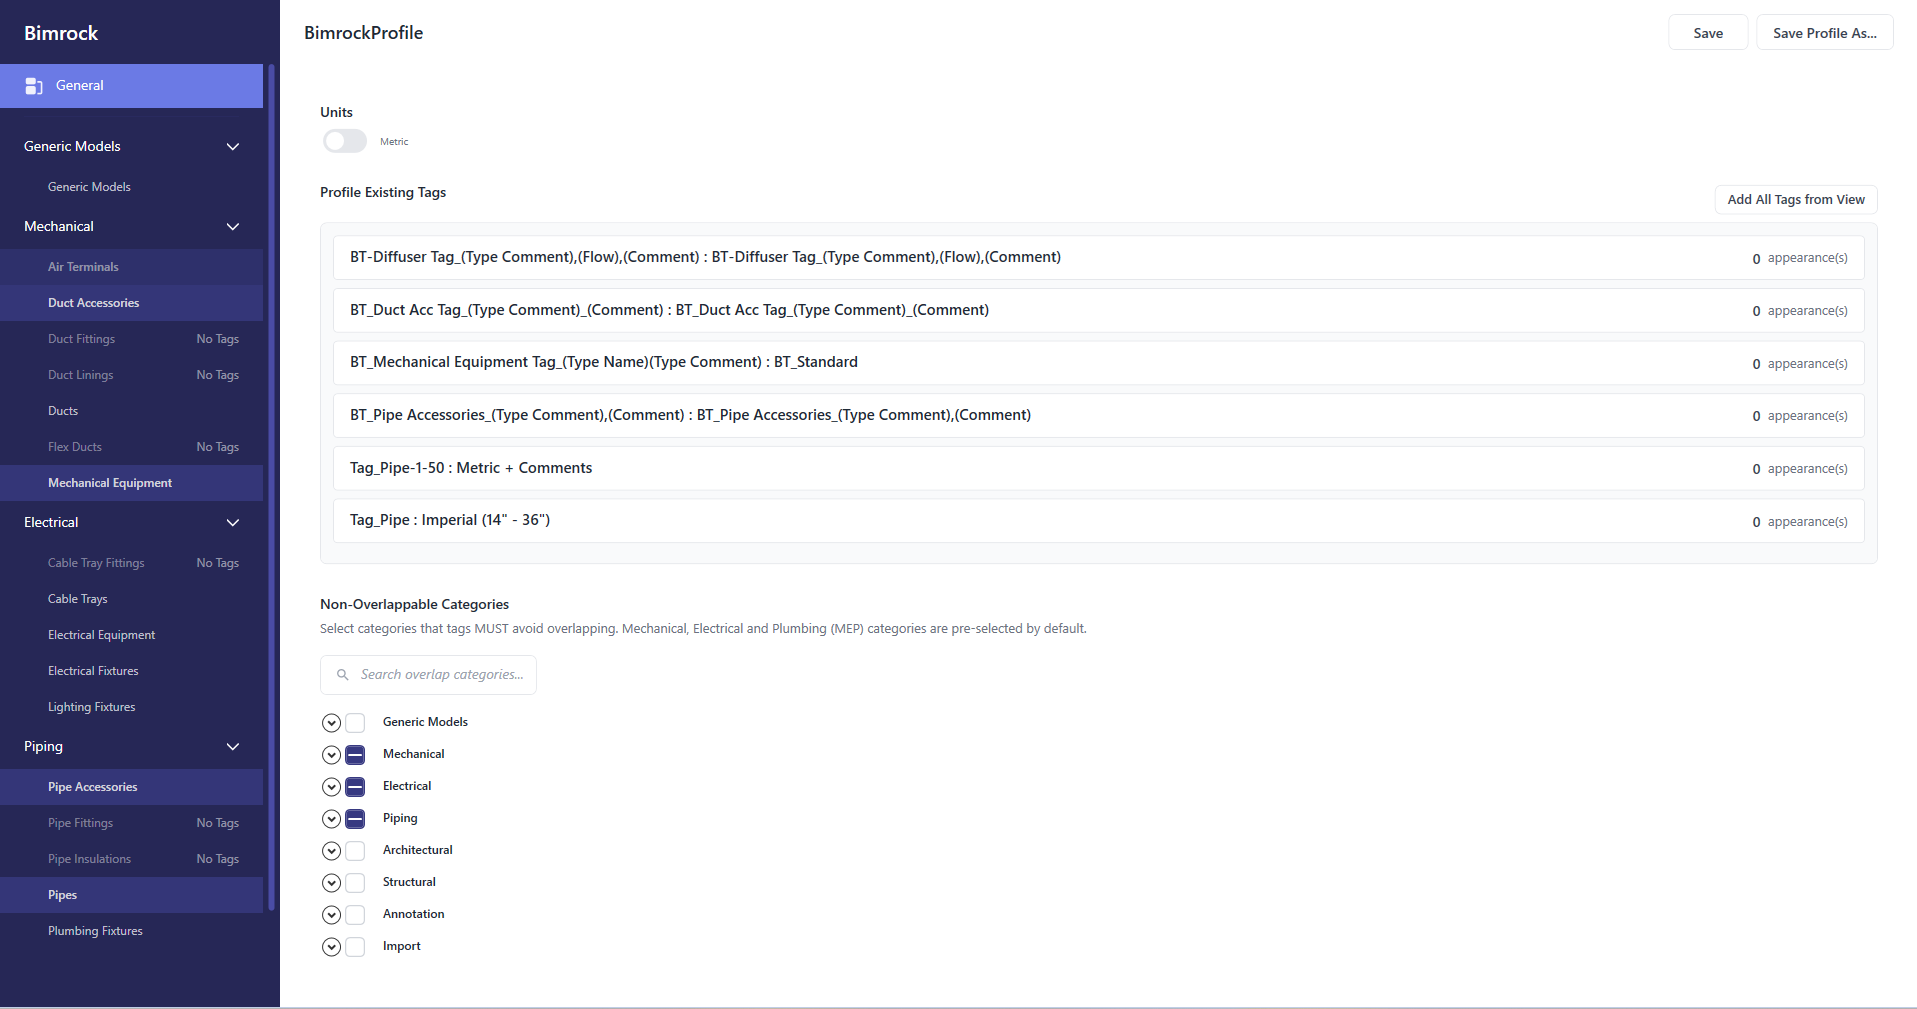
Profiles encode your tagging standards: which categories to tag, which tag families to use, and how to handle placement and overlaps. Define once, apply everywhere.
What's in a Profile
- Category selection - Which MEP categories to tag (Ducts, Pipes, Equipment, etc.)
- Filters - Control which elements are tagged (system type, element type, direction, minimum length, and more)
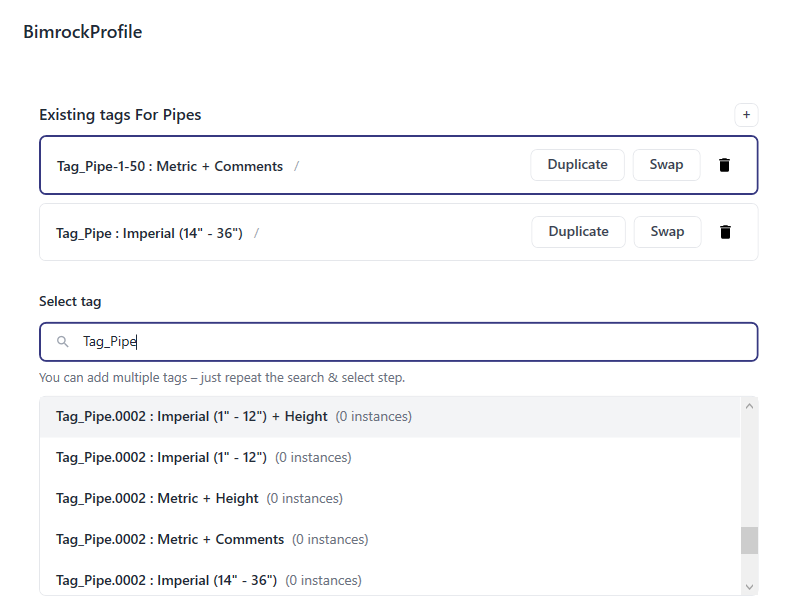
- Tag family mappings - Which tag family to use for each category
- Placement rules - Tag position relative to elements, leader preferences
- Overlap handling - Which categories tags should avoid overlapping
Deep Dive: Filters
For detailed coverage of Element Type, System Type, My Revit Filters, Direction, Length, Interval Tagging, and Change In Dimensions, see Controlling What Gets Tagged.
The Default Profile
Bimrock ships default profiles for HVAC and Plumbing, pre-configured for common MEP documentation. These are read-only -you can't modify them directly, but you can duplicate them as a starting point.
Start from Default
Duplicate the default profile and modify the copy. This gives you a working baseline to customize for your office standards.
Creating and Editing Profiles
Create a New Profile
- Click Create New Profile in the Profiles ribbon
- Choose to start from an existing profile or blank
- Name it descriptively (e.g., "Office Standard - HVAC Plans")
- Configure categories, tag families, and placement rules
- Click Save in the header
Edit an Existing Profile
- Select the profile in the Active Profile dropdown
- Click Edit Active Profile
- Make changes in the Profile Editor
- Click Save in the header
Profile Organization
Suggested naming conventions:
- Include discipline: "HVAC Plans", "Plumbing Plans", "Electrical Plans"
- Include view type if relevant: "HVAC - Floor Plans", "HVAC - Sections"
- Add version if you iterate: "Office Standard v2"
- Use project names for project-specific variations: "Project ABC - Mechanical"
Sharing Profiles
Profiles are JSON files. To share across your team:
Shared Network Folder (Recommended)
- Store profiles in a shared network location
- Each team member clicks Manage Profiles Folder and points to that location
- Everyone sees the same profiles in their dropdown
- Updates to a profile are immediately available to everyone
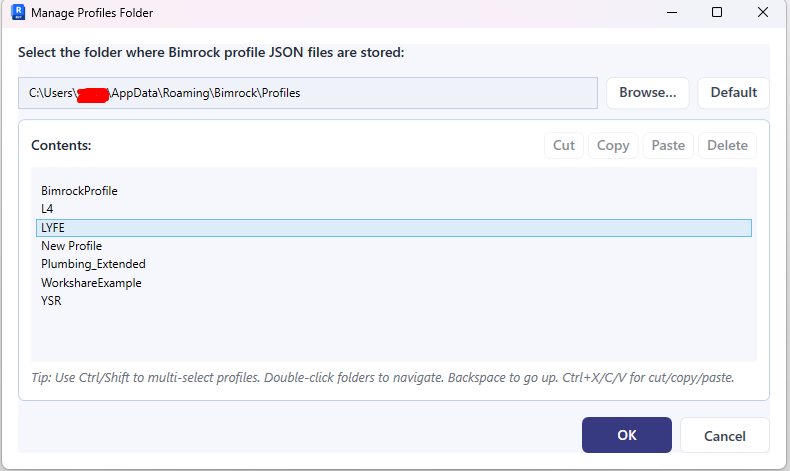
Profile Storage Locations
| Type | Location |
|---|---|
| Default profiles | Installed with Autotag (read-only) |
| User profiles | %APPDATA%\Bimrock\Autotag\Profiles |
| Shared profiles | Custom folder (set via Manage Profiles Folder) |
Document Your Standards
Add your office standard profiles to your BIM manual. This helps new team members understand which profile to use for which view type.